보통 shp을 업로드할 때 postgresql + postgis 를 사용하고 있는 경우라면 가장 많이 사용하는 업로드 툴은 자체적으로 제공하는 'Postgis 2.0 Shapefile and DBF Loader Exporter' 라는 툴 일 것이다.
이 툴은 DBMS에 직접적으로 Connection을 해야하기때문에 실무에서 사용하기 곤란한 상황을 대비하여 SHP 을 업로드하는 다른 방법을 알아보려고 한다.
먼저 관리하고자 하는 샘플 SHP파일을 다운로드 한다. 아래 시도/시군구 경계를 다운로드 한다.
출처 : http://www.gisdeveloper.co.kr/?p=2332
대한민국 최신 행정구역(SHP) 다운로드 – GIS Developer
www.gisdeveloper.co.kr
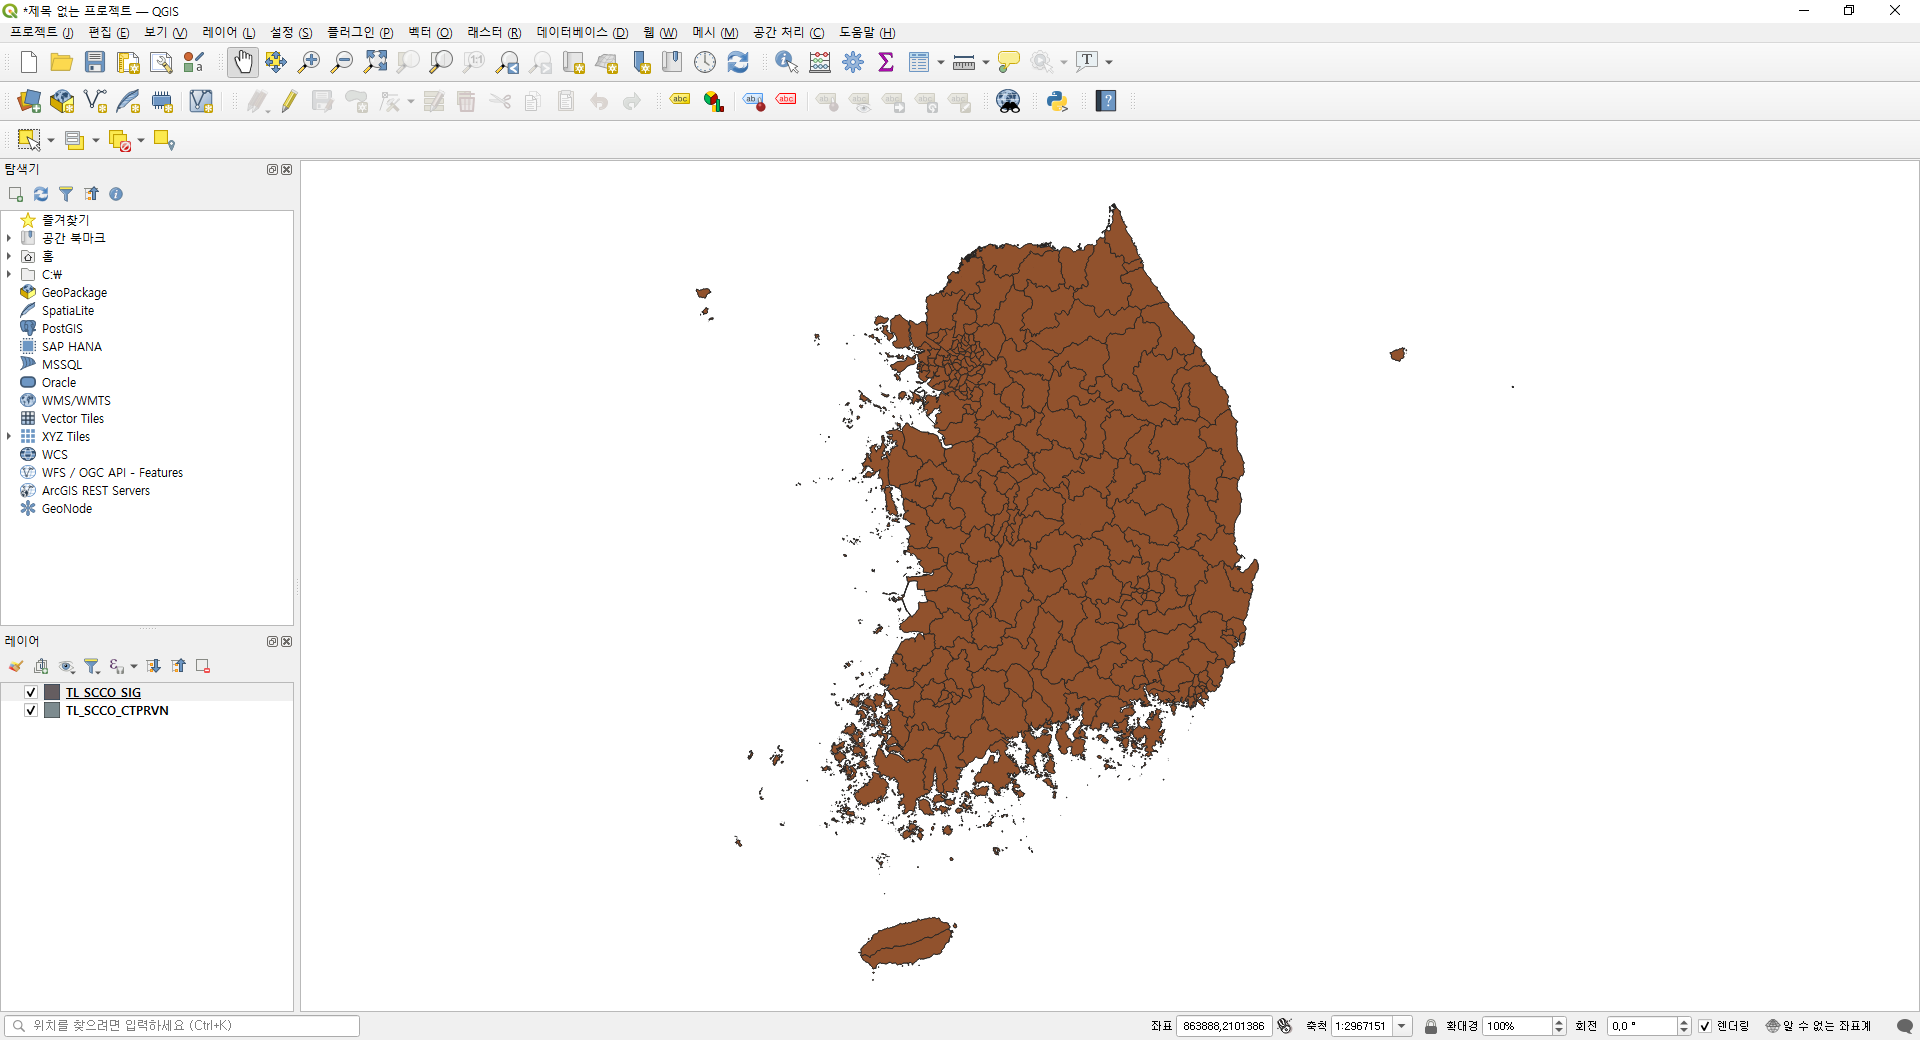
해당 파일을 다운로드 후 압축을 풀어서 QGIS 에서 열어본다.
QGIS 에서 정의된 좌표계 및 속성데이터의 컬럼들을 확인한다.
※ 보통 SHP의 속성테이블의 컬럼과 DBMS 테이블 컬럼구조를 맞추는게 향 후 갱신 시 편하다.
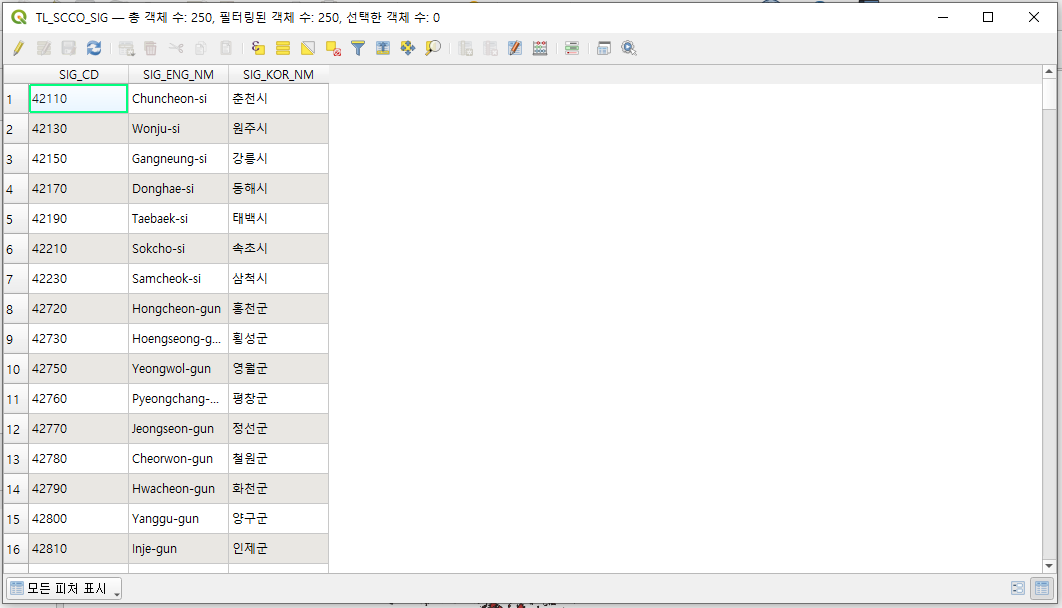
속성테이블에서 컬럼을 확인한다.
나중에 이대로 업로드하면 한글 속성이 깨지는 문제가 발생한다.
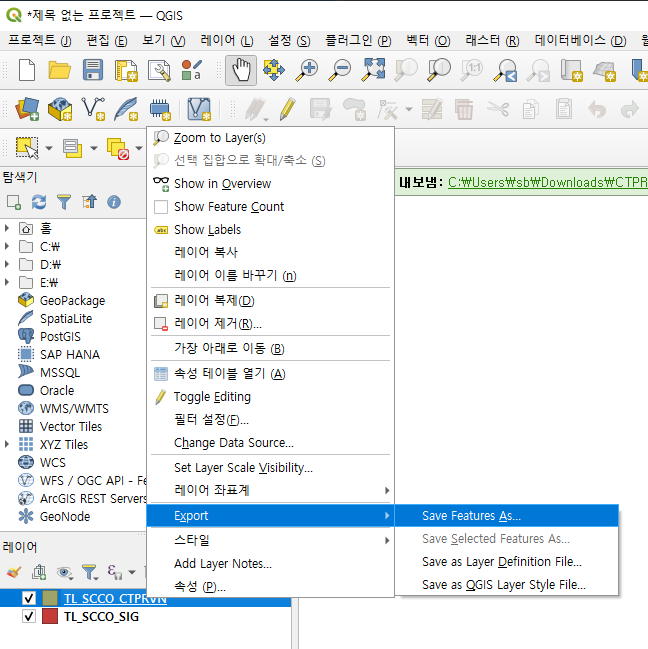
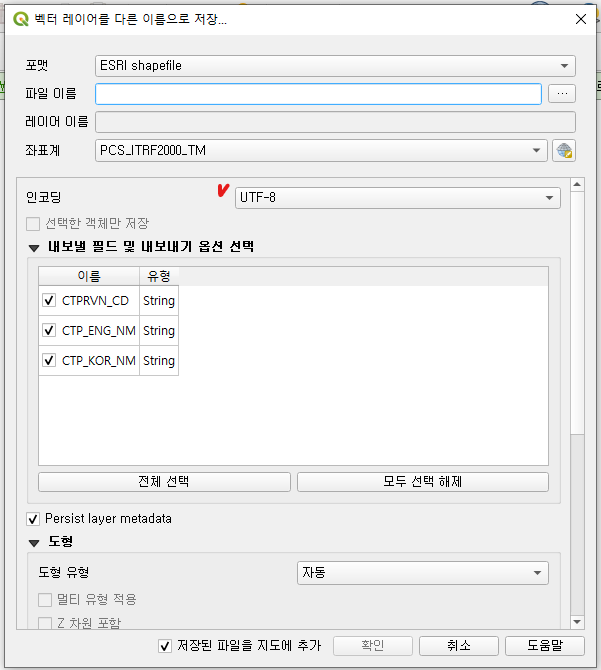
QGIS 에서 인코딩을 변경해준 뒤 export 해준다.
이제 SHP 파일의 구조를 확인했으니 nodejs(14.x.x) 를 구성한다.
※ 현재 gdal 은 nodejs 14 이하에서만 작동하는 것 같습니다..... 상위버전에서 문제없으면 공유부탁드려요!
시작에 앞 서 postgresql 이 설치되어있어야 한다. 나는 도커 컴포즈로 올려서 진행하였다.
https://github.com/kartoza/docker-postgis/blob/develop/docker-compose.yml
GitHub - kartoza/docker-postgis: Dockerfile for postgis
Dockerfile for postgis. Contribute to kartoza/docker-postgis development by creating an account on GitHub.
github.com
shp 을 업로드하기 위해 필요한 라이브러리를 설치한다.
npm install --save sequelize pg pg-hstore multer gdal- multer : 파일 업로드 라이브러리
- gdal : shp 파일을 업로드하기 위해 필요한 라이브러리
- 이외에 nodejs 구성에 필요한 추가 라이브러리를 각자 환경에 맞춰 추가하시면 됩니다.
업로드할 shp 속성테이블의 구조에 맞는 sequelize 모델(시도 테이블, 시군구 테이블)을 생성한다.
※ sequelize 초기 셋팅에 대한 설명은 생략합니다. 기본 셋팅 방법은 해당 링크 글을 참조 하시기 바랍니다.
'use strict';

/* tlSccoCtprvn.model.js */
module.exports = (database, dataType) => {
    const tlSccoCtprvn = database.define('tlSccoCtprvn', {
        id: {field: 'id', type: dataType.INTEGER, primaryKey: true, autoIncrement: true},
        geom: {field: 'geom', type: dataType.GEOMETRY},
        ctprvn_cd: {field: 'ctprvn_cd', type: dataType.STRING(2), allowNull: true},
        ctp_eng_nm: {field: 'ctp_eng_nm', type: dataType.STRING(40), allowNull: true},
        ctp_kor_nm: {field: 'ctp_kor_nm', type: dataType.STRING(40), allowNull: true},
        createdAt: {field: "created_at", type: dataType.DATE},
        updatedAt: {field: "updated_at", type: dataType.DATE},
    }, {
        classMethod: {},
        tableName: 'tl_scco_ctprvn',
        underscore: true, //카멜케이스
        timestamps: true, //createAt, updateAt 컬럼 추가 여부
    });

    return tlSccoCtprvn;
}
'use strict';
/* tlSccoSig.model.js */
module.exports = (database, dataType) => {
const tlSccoSig = database.define('tlSccoSig', {
id: {field: 'id', type: dataType.INTEGER, primaryKey: true, autoIncrement: true},
geom: {field: 'geom', type: dataType.GEOMETRY},
sig_cd: {field: 'sig_cd', type: dataType.STRING(5), allowNull: true},
sig_eng_nm: {field: 'sig_eng_nm', type: dataType.STRING(40), allowNull: true},
sig_kor_nm: {field: 'sig_kor_nm', type: dataType.STRING(40), allowNull: true},
createdAt: {field: "created_at", type: dataType.DATE},
updatedAt: {field: "updated_at", type: dataType.DATE},
}, {
classMethod: {},
tableName: 'tl_scco_sig',
underscore: true, //카멜케이스
timestamps: true, //createAt, updateAt 컬럼 추가 여부
})
return tlSccoSig;
}모델을 생성 한 뒤 서버를 구동하면 테이블 생성됐음을 확인할 수 있다.

nodejs 에서 업로드를 위한 API 를 생성한다.
./routes/api/shp/index.js
'use strict';

const router = require('express').Router();
const shpController = require('./shp.controller');
const multer = require('multer');
const fs = require('fs');

const fileUpload = multer({
    // dest: './tmp/',
    storage: multer.diskStorage({
        destination: (req, file, cb) => {
            const dir = './tmp';
            !fs.existsSync(dir) && fs.mkdirSync(dir);
            cb(null, './tmp');
        },
        filename: (req, file, cb) => {
            cb(null, `upload.${file.originalname.split('.').pop()}`);
        }
    })
}).array('shapeFile');

router.post('/ctprvn', fileUpload, shpController.uploadCtprvn);
router.post('/sig', fileUpload, shpController.uploadSig);

module.exports = router;
※ multer 사용법은 구글링을 통해 찾을 수 있다. 업로드된 파일이 저장될 경로 및 파일명은 임시로 작업하였고, 추후에 실무에서는 여러 유효성 검증이 필요하다. 기본적으로 shp을 업로드하기 위해서 *.shp , *.shx , *.dbf 파일 3개를 올려야하는데 이 때, 3개의 파일명은 같아야한다. 이 부분을 반드시 유의해야한다.
./routes/api/shp/shp.controller.js
'use strict';

const shpService = require('../../../service/shp.service');

module.exports = {
    async uploadCtprvn(req, res) {
        try {
            await shpService.uploadCtprvn(req.files);

            res.status(200).send('ctprvn shp upload success!');
        } catch (e) {
            res.status(500).send('ctprvn shp upload fail!');
        }
    },

    async uploadSig(req, res) {
        try {
            await shpService.uploadSig(req.files);

            res.status(200).send('sig shp upload success!');
        } catch (e) {
            res.status(500).send('sig shp upload fail!');
        }
    },

}
※ 실제 로직단은 shp.service.js 파일로 분리하였다. (controller 에서 service 내용을 같이 써줘도 됨)
./service/shp.service.js
'use strict';
const {db: {tlSccoCtprvn, tlSccoSig}, sequelize} = require('../../sequelize');
const logger = require('../../config/winston')('shp.controller');
const gdal = require('gdal');

const getSpatialDataRows = (shapeFiles) => {
    let results = [];
    const shpFile = shapeFiles.find(e => e.filename.includes('.shp'));
    try {
        const dataset = gdal.open(`${shpFile.destination}/${shpFile.filename}`);
        const layer = dataset.layers.get(0);
        layer.features.forEach((feature, idx) => {
            const params = {};
            feature.fields.forEach((value, key) => {
                params[key.toLowerCase()] = value;
            });

            const geojson = JSON.parse(feature.getGeometry().toJSON());
            geojson.crs = {type: 'name', properties: {name: `EPSG:3857`}};
            params.geom = geojson;
            results.push(params);
        });
    } catch (e) {
        results = [];
    }

    return results;
};

module.exports = {
    async uploadCtprvn(shapeFiles) {
        try {
            return await sequelize.transaction(async t => {
                await tlSccoCtprvn.destroy({where: {}, truncate: true});
                return await tlSccoCtprvn.bulkCreate(
                    getSpatialDataRows(shapeFiles),
                    {transaction: t}
                );
            });
        } catch (e) {
            logger.error(e);
            throw e;
        }
    },
    async uploadSig(shapeFiles) {
        try {
            return await sequelize.transaction(async t => {
                await tlSccoSig.destroy({where: {}, truncate: true});
                return await tlSccoSig.bulkCreate(
                    getSpatialDataRows(shapeFiles),
                    {transaction: t}
                );
            });
        } catch (e) {
            logger.error(e);
            throw e;
        }
    },

}- getSpatialDataRows 함수는 업로드된 파일들을 갖고 gdal 을 통해 읽은 뒤 , 레이어 안에 포함된 피처들의 속성 정보 및 지오메트리 정보를 json 형태로 가공하여 배열로 리턴한다.
- 데이터를 업로드 할 때, 기존에 있는 데이터는 전부 삭제 시킨 뒤 저장한다.
- 업무 프로세스에 따라 일부 변경 및 유효성 검증이 추가로 필요하다.
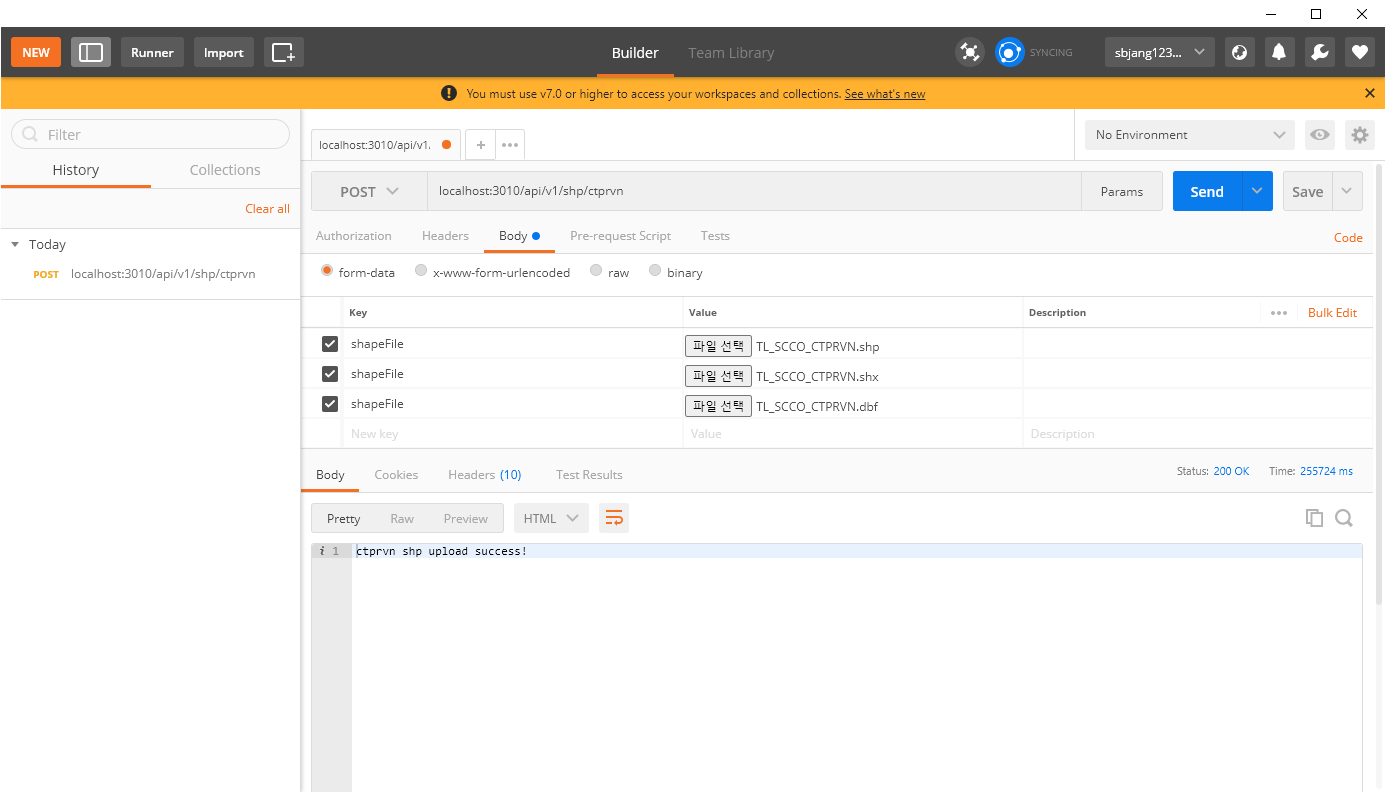
업로드 API 를 postman 을 통해 테스트를 하면, 성공 메세지가 출력된다.
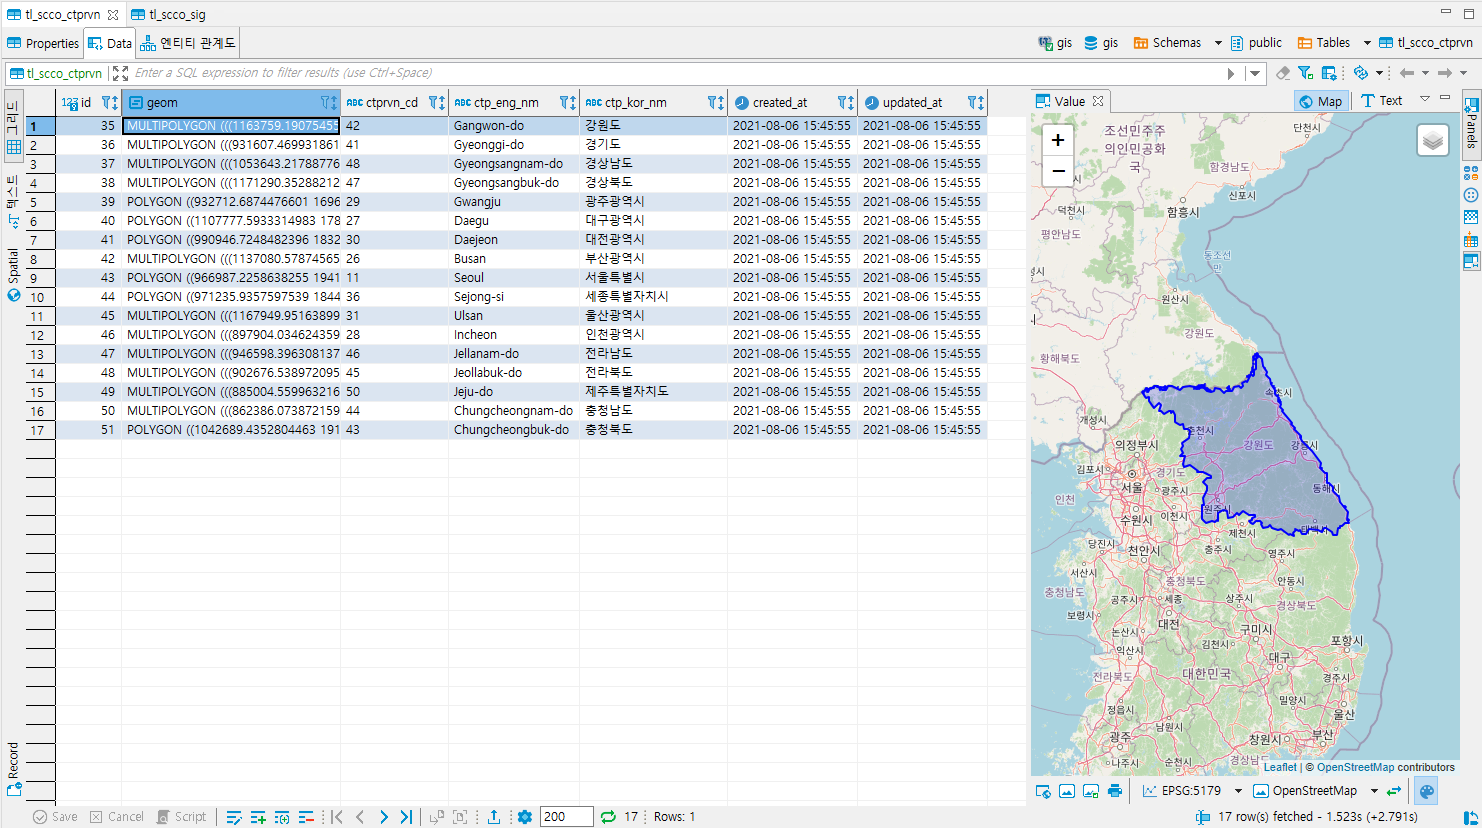
이 후 , DBeaver 를 통해 정상적으로 데이터가 업로드 됐음을 확인할 수 있다.
참고소스
https://github.com/sbjang123456/nodejs-sequelize-spatial.git
GitHub - sbjang123456/nodejs-sequelize-spatial: sequelize 공간데이터 업로드 및 조회
sequelize 공간데이터 업로드 및 조회. Contribute to sbjang123456/nodejs-sequelize-spatial development by creating an account on GitHub.
github.com
'Nodejs > Sequelize' 카테고리의 다른 글
| Sequelize migration (0) | 2022.02.23 |
|---|---|
| Sequelize Native Query - sequelize.query() 사용법 (0) | 2022.01.18 |
| nodejs sequelize (+postgis) geojson by extent (0) | 2021.08.06 |
| Nodejs Express + Sequelize 기본 셋팅(Postgresql) (0) | 2021.03.31 |

